A first electric scooter for kids looks harmless in the product photos: bright colors, a low deck, a smiling child in a helmet that somehow never has a chin strap. Then the box shows up, the battery charges, and your kid is rolling at 10 mph on a machine with no seatbelt, no airbags, and a braking system that depends entirely on a nine-year-old's reaction time.
I've been car-free in Austin for four years, which works out to roughly 900 commutes on two wheels, most of them across the Congress Avenue bridge in August heat. That taught me plenty about controllers, tires, and voltage sag. It taught me almost nothing about teaching a kid, until I started paying attention to families at the park and comparing notes with the ER nurse who once explained to me what a scooter crash without a helmet actually looks like. I have worn a helmet on every ride since that conversation.
The sequence below is what I would want if I were handing a scooter to a kid I love. Gear first, braking second, throttle third, distance last. The scooter matters. The order matters more.
Why you should trust me
I've owned seven scooters in four years. A GOTRAX taught me what a dying controller smells like (burnt toast). A Hiboy taught me that tubed tires hate Texas heat. A Segway Ninebot Max taught me what real engineering feels like when it survives a year of abuse without a single unplanned repair. A used Kaabo taught me why you don't buy a 60 mph scooter to ride at 18.
I keep a repair log in a battered notebook and a spreadsheet of every mile, every tire pressure, and every range claim a manufacturer has told me that didn't survive contact with a headwind and a bridge. The e-bike mechanic on East 6th taught me how to read a controller's MOSFETs and why cheap ones burn out. My coworker Marcus commuted nine miles each way on a Ninebot Max for three years and never once called a rideshare.
What I'm not going to do is tell you a scooter is safe. I'm going to tell you where the failure modes are, because that's the useful version of the answer.
How I picked and how I tested
I have not run either of these two scooters through my 14-mile Congress Avenue loop, and I'm not going to pretend I did. A 10 mph kids machine is a completely different animal from a 28 mph adult commuter, and the failure modes are different too: the kids scooter fails at the curb, the adult scooter fails at the controller.
Here's the filter I applied instead, adapted for a rider who weighs 60 pounds and has been alive for a decade:
- What stops it. A brake a small hand can actually reach and squeeze, plus a second braking method as backup. If the only brake is a stomp-on fender, that's a design choice I don't love for a beginner.
- What it rolls on. Tire size and tube type decide how often you'll be doing maintenance. Tubeless is the upgrade I recommend to anyone who commutes, and the same logic applies here in miniature.
- What the motor rating actually means. Peak watts are a party trick. A 350W peak motor is not a 350W motor in the way you think it is, and the honest number on a kids scooter is the top speed, not the wattage.
- What happens the first time a tire goes flat. In July. Two miles from the house.
- Battery honesty. Watt-hours is the only battery number that matters. Amp-hours is marketing math, and if a spec sheet hides the Wh, it's usually hiding something else.
The claimed range numbers deserve their own warning. Range gets tested in a lab with a light rider, no wind, flat ground, and a freshly charged battery. A lighter rider does get closer to the claim than I do at 185 pounds, but hills, heat, and a half-charged pack still take their bite. Treat any "miles" figure on a box as the ceiling, never the expectation.
What a kid-ready scooter actually needs
A speed cap that matches the rider, not the rider's future. The kid will get faster on their own. You don't need to buy speed in advance, and a scooter that tops out around 10 mph is plenty for a first machine. Buy for the child standing in front of you, not the teenager they'll be in three years.
Four wheels before two, for younger riders. A four-wheel platform doesn't tip when a kid forgets to put a foot down. That's the entire point. It buys you weeks of confidence.
Tires that survive your streets. Check PSI before the first ride and then weekly, because 10 PSI low costs range, speed, and tube life, and nobody, adult or child, checks it. If the tires are pneumatic, know whether they're tubed or tubeless, because that determines your Saturday afternoons.
Weight capacity with headroom. Kids grow, backpacks get heavier, and a scooter run at its limit all day will flex and wear in ways it shouldn't. Look for a listed capacity and stay well under it.
A real battery management system. The BMS is the circuit that keeps cells balanced and keeps the pack from becoming a fire. Cheap scooters cheap out here first, which is why a no-name bargain from a marketplace listing is a worse deal than it looks.
An IP rating you can trust. IP54 means rain-safe-ish. Anything less means it's a fair-weather toy, and kids ride in puddles.
Beginner scooters worth starting on
Both of the machines below fit the checklist above, at two different stages of a kid's riding life. The first is a confidence builder. The second is the graduation.
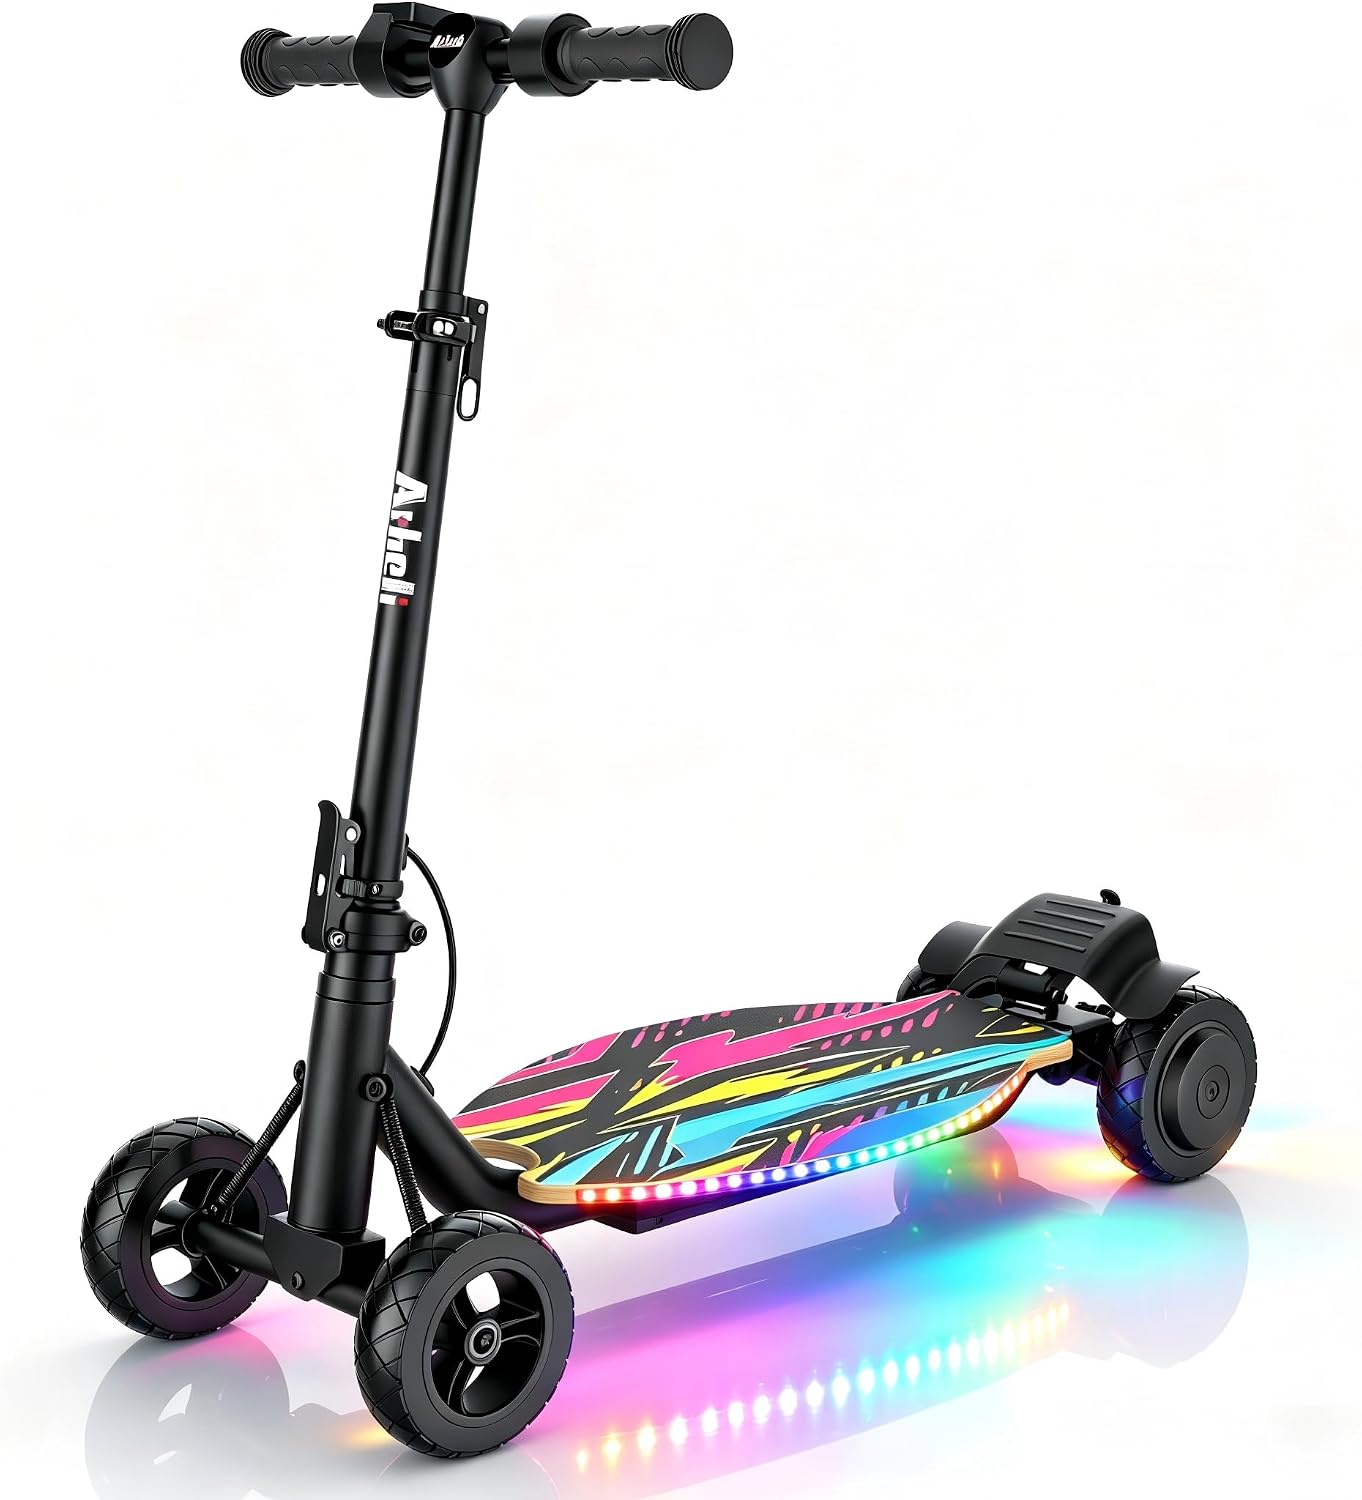
Best first scooter for young riders: 4-Wheel Electric Scooter for Kids 350W Peak Motor, Max 10 MPH & 8.5 Miles
 Visit on Amazon →
This is the one I'd hand to a kid who has never been on anything powered. The four-wheel stance is the whole argument: there's no balancing act to learn at the same time as the throttle, no tipping moment when the kid forgets to put a foot down at a stop sign, and no drama when they roll over a driveway lip at the wrong angle. The spec sheet says a 350W peak motor, a 10 mph top speed, and up to 8.5 miles of range.
Two notes on those numbers. First, peak watts are a party trick: the motor can hit that figure briefly, and what you actually care about here is the 10 mph cap, which is a reasonable place for a beginner to start. Second, the 8.5 mile range claim is a lab figure, which means flat ground, a light rider, and a fresh pack. For a kid doing loops of a driveway and a cul-de-sac, that's more than enough, and the honest way to read it is "a week of short rides between charges."
Flaws but not dealbreakers: Four wheels teach a kid to steer, not to lean. That's fine and even preferable at the start, but plan the graduation, because leaning is the skill that makes a two-wheel scooter feel natural later. Also, a four-wheel platform isn't hopping curbs, so pick your route accordingly.
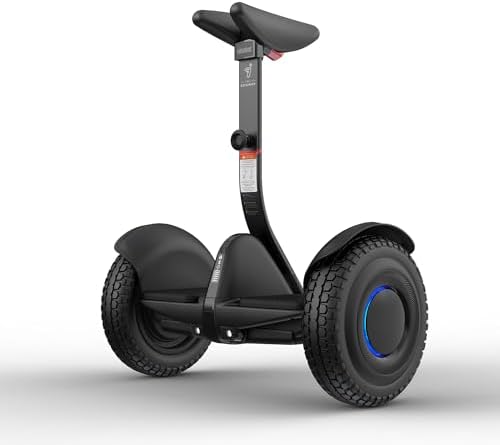
Best step-up for older kids and teens: Segway Ninebot S2 Electric Self-Balancing Scooter, 10-Inch Tubeless Tires
 Visit on Amazon →
The Segway Ninebot S2 is the graduation machine, and the 10-inch tubeless tires are the detail I keep coming back to. Tubeless means fewer pinch flats and less time spent patching tubes, which matters more in Texas heat than any spec sheet admits. I've had a Ninebot in my own rotation that survived a year of real abuse and made me respect how Segway builds things, and that reputation is the reason this is the step-up I'd pick over a no-name self-balancing unit.
Here's the honest caveat. Self-balancing works differently from a scooter with a steering column. The platform handles the job of keeping the rider upright, so the rider has to learn weight transfer before they learn anything else, and that learning curve is real. This is not a first machine for a six-year-old, and it is not a machine to turn loose in a park without an adult standing right there.
Flaws but not dealbreakers: The learning curve takes a few sessions, and the first one usually ends with a wobbly kid and a nervous parent. That's normal. Give it a flat, smooth, empty surface and let it take the time it takes.
The eight-step teaching progression
This is the sequence I'd follow with any kid and any scooter on this list. It works on a driveway, an empty tennis court, or a church parking lot on a Sunday morning. It does not work on a sidewalk with driveways, which is where I see most first rides happen.
Step one: Gear before power. Helmet on, chin strap snug, every ride, including the driveway. Then wrist guards, then knee and elbow pads for the first few sessions. A helmet that lives in the garage does nothing.
Step two: Power off, learn the machine. Have the kid stand next to it, walk it around, and get used to the weight. They should know where the brake is before the motor ever turns on.
Step three: Braking before throttle. This is the one that matters most. Teach the brake first, at walking pace, with the power off if possible. A kid who knows how to stop can be trusted with speed. A kid who doesn't is a liability at any speed.
Step four: Deck balance with power off. Stand on the platform, one foot then two, then step off. Repeat until it's boring. Boring is the goal.
Step five: Lowest speed mode, first throttle. Flat, smooth, empty pavement. No hills, no gravel, no dogs, no other kids. Stay within arm's reach for the first several sessions.
Step six: Turning and leaning. Set up two cones or water bottles, and have the kid ride slow figure eights. Slow is harder than fast, and slow is where the control gets built.
Step seven: Hills, downhill first. Downhill is a braking test, not a speed test. Walk the hill before riding it and point out where they'll stop.
Step eight: The first real ride. A short loop, an adult on foot or on a bike, agreed stopping points, and a helmet. Then repeat it until the route is genuinely boring before you extend it.
What I left off this list and why
No-name scooters with mystery battery cells. If the listing won't tell you the watt-hours or the IP rating, the BMS is probably where the money went missing. I've smelled what a cheap controller does when it dies, and I don't want a kid anywhere near that.
25 mph "teen" scooters. A scooter that goes 25 mph is an adult commuter machine, and buying one for a 12-year-old is buying a future injury with better acceleration. Speed is the last thing a beginner should get more of.
Gas-powered scooters. Loud, smoky, and a maintenance schedule built for someone with a garage and patience. Wrong tool for a family.
Hoverboards without any support structure. No handlebar, no brake lever, no way for a beginner to arrest their own momentum. Different product category, same problem.
Used scooters of unknown provenance. A used scooter can be a great deal if you know what to check: battery health, tire condition, controller behavior under load, and whether the frame has been crashed. For a kid's first machine, buy new and skip the guessing.
What this all costs
The two scooters here sit in different price tiers, so check current Amazon price on each and decide which stage of riding you're actually buying for. The four-wheel kids scooter is the cheaper entry point and the smarter first purchase for most families. The Segway is the one you buy a year or two later, once the kid has proven they can brake, steer, and stop on command.
Gear adds to the total, and it is not optional: helmet, wrist guards, knee and elbow pads. A helmet costs less than a single urgent care copay, which is the only cost-per-use math in this article that I'd call a no-brainer.
The other number worth thinking about is maintenance. Tire pressure checked weekly extends tire life. A pack stored at room temperature and charged properly lasts longer than one left at 100% in a hot garage all summer, and Austin garages get hot. Treat the battery like it costs money, because replacing it does.
None of this is expensive relative to what a kid gets out of it: a way to move through the neighborhood under their own power, at a speed where the world still goes by slow enough to see. That's the point of the whole exercise.
Get the helmet on first. Teach the brake. Then hand over the throttle. That order is the entire guide, and everything above it is just detail.