Most commuter electric scooter advice is written by people who have never ridden one to work. They quote the box: a range figure, a top speed, a peak wattage. Then you get on at 185 pounds in August, with a headwind and a bridge in front of you, and you find out what the box actually meant.
I have been car-free in Austin for four years. My commute is 14 miles round trip, most of it across the Congress Avenue bridge, and I have owned seven scooters in that time. Two of them died in ways I could have predicted if I had read the spec sheet correctly. This is the checklist I wish someone had handed me before the first one.
By the end you will know how to read a battery spec, how to test a hill before you buy, what tires cost you in Texas heat, and which two scooters sit at the realistic ends of a commuter budget.
Why you should trust me
I ride 14 miles a day, five days a week, plus errands and the occasional 2 AM taco run. That works out to roughly 3,500 miles a year on the same route, and I keep a spreadsheet of every mile, every tire pressure reading, and every range claim a manufacturer made that turned out to be fiction.
I have patched four tubes, replaced one deck, and blown two controllers. The second controller failure is why I care more about heat management and MOSFETs than about top speed. The first one smelled like burnt toast and left me walking two miles at 9 PM.
I am not a shop and I am not a brand ambassador. I am a commuter with a repair log, a pump with a gauge, and a grudge against marketing math. That is the perspective in this article.
How I picked and how I tested
Two things up front.
The two scooters in this guide are here because each one fills a real role in a commuter decision, not because I ran a lab test on them. Where a number matters, I tell you to pull it off the listing or the spec sheet yourself instead of repeating a claim I cannot verify. I would rather hand you the method than a number I did not measure.
The method is the one I run on my own scooters: same 14-mile loop, same rider weight, same tire pressure, same August heat. On my own rides I log watt-hours pulled from the battery rather than the miles the display promises, because the display is optimistic and the watt-hours are not. That is the test a scooter has to pass before I recommend it to anyone who has to get to work on it.
The checklist: what a commuter electric scooter actually has to do
Watt-hours beat amp-hours every time. Amp-hours are marketing math. A 48V pack rated at 10Ah is 480Wh. A 36V pack rated at 13Ah is only 468Wh, and the second one will feel slower on your hill. If a listing will not tell you the watt-hours, multiply volts by amp-hours yourself and treat the result as the only honest capacity number in the ad.
Hill performance is the first test, not the last. If a scooter cannot climb the worst hill on your route at your weight, nothing else about it matters. Voltage sag is what you feel when the pack is half empty and the climb suddenly costs you speed. A scooter that climbs fine on a fresh battery and wheezes at 40% is a scooter that will make you nervous every afternoon.
Tires decide your monthly maintenance bill. Tubed tires on a commuter scooter are a subscription. Potholes pinch-flat them, heat ages them, and you will either learn to patch a tube or pay someone who can. Tubeless is the upgrade I recommend to every commuter who asks.
Tire pressure is the spec nobody checks. Ten PSI low costs you range, speed, and tube life all at once. Check it weekly. I say that as someone who checks it monthly and has the scar tissue to prove it.
Weight and fold matter more than top speed. A scooter you cannot carry up three flights of stairs is not a commuter scooter, it is a garage ornament. Weigh it against your stairs before you weigh it against your ego.
The controller is the soul of the machine. It converts battery power into motor power and it is the first thing to fail on a cheap build. Ask what happens under a sustained full-throttle climb. If the answer involves a heatsink and a real warranty, that is a good sign.
Brakes and lights are not accessories. You need a front brake that still works in the rain and a light bright enough to be seen at dusk on a bridge with no shoulder.
UL certification is the floor, not a feature. A certified battery pack and a decent BMS are the difference between a scooter and a fire risk in your hallway.
The two scooters I would start with
The short version: one of these is the commuter I would ride tomorrow, and the other is the cheaper way to find out whether scooter commuting is for you at all. Both are below, with the same caveat I give everyone. Verify the spec sheet yourself, and check the listing, because pricing moves.
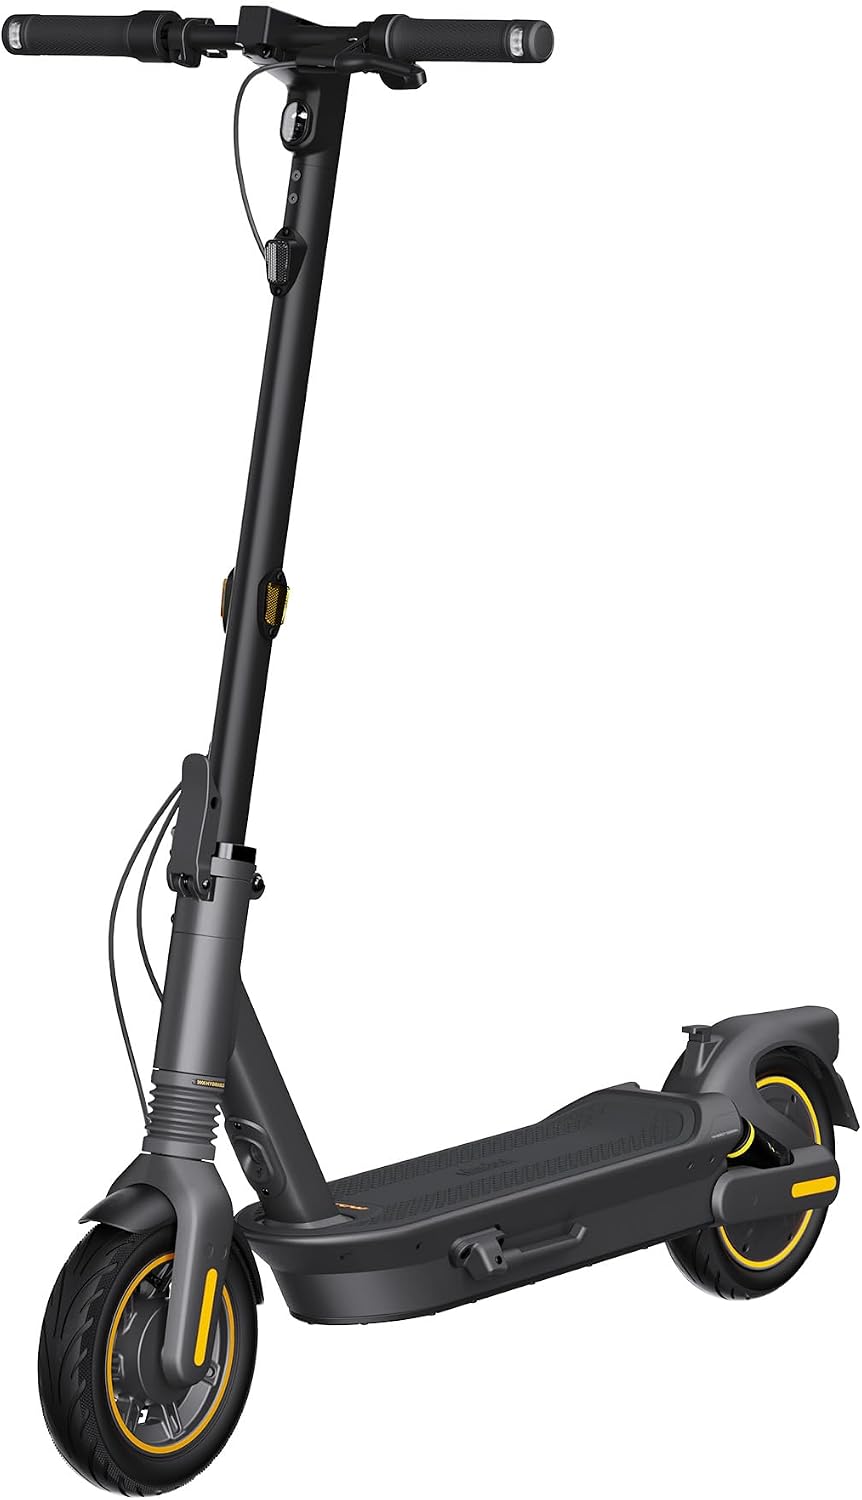
Our pick: Segway Ninebot MAX G3 Plus/G3 / G2 Electric Scooter for Adult, UL Certified
 Visit on Amazon →
This is the one I point at first when someone asks what to buy for a real commute. The Max line is the scooter that made me respect engineering, and the G2 platform is the best overall commuter scooter I have tested. My own Max survived a full year of Austin abuse, including 105-degree afternoons and more rain than I should admit riding in, without a single unplanned repair. The G3 version keeps that recipe: a deck you can stand on for 45 minutes, brakes that behave, and a build that does not rattle itself apart by month three. The UL certification on the listing matters because it speaks to the battery and charging system, which is exactly where cheap scooters cut corners.
What I would verify before buying: the watt-hours of the pack, the tire type, and the rated climbing grade. Those three numbers tell you more than any speed claim on the page. The Max line is not a featherweight if your commute ends in a stairwell, and it is the pricier of the two here.
Flaws but not dealbreakers: It costs more than the alternative below, and it is heavier than a stripped-down budget scooter. Neither of those is a reason to avoid it if you ride every day.
Anyone who wants one scooter to do everything, and who does not want to think about this again for two years, should start here.
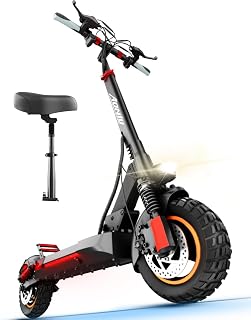
Budget pick: M4 Electric Scooter for Adults Off Road Escooter for Commuting
 Visit on Amazon →
The M4 is the lower entry point, and it leans off-road in its name and its setup. That cuts both ways on a commute. Treaded tires handle broken pavement, gravel shoulders, and the kind of chip-seal that rattles a street tire, and they are usually more forgiving of the potholes that ruin your week. On smooth pavement, the same tread can be noisier and slower than a street tire, and off-road geometry sometimes means a taller, heavier package to haul upstairs.
Before you buy, pull three things off the listing: the watt-hours of the battery, whether the tires are tubed or tubeless, and the weight. If you are a first-time buyer on a tight budget who wants to learn what you actually need, this is a reasonable place to start. If you already know you will ride 14 miles a day, spend up.
Flaws but not dealbreakers: The off-road flavor tells you it was designed for mixed surfaces, not for a straight shot down a bike lane, so tune your expectations accordingly.
Step by step: how to choose and set up a commuter scooter
Step one: Measure your real route. Not the shortest path on a map. The route you will actually ride, with the hills, the bridge, the bad pavement, and the detour around the construction. Write down the one-way distance and the biggest climb. That climb decides everything else.
Step two: Get the watt-hours. Volts times amp-hours. Write it down and compare scooters by that number, not by claimed miles. Real range at 185 pounds in August heat with a headwind is a fraction of the lab figure, and the fraction is smaller on cheap packs.
Step three: Test the worst hill. If you can test ride, ride that hill first, at your weight, with the battery around half. That is where voltage sag shows up. If you cannot test ride, look for reviews that mention climbing and rider weight in the same sentence. A climbing claim without a rider weight is a story, not a data point.
Step four: Check the tires and the tube situation. Tubeless is better for commuting. Tubed means you learn to patch, or you budget for a shop. Carry a patch kit, a pump, and the wrench your axle needs.
Step five: Weigh it against your stairs. If you carry it up more than one flight a day, weight is a hard filter. Do not buy the heaviest scooter in your budget because the spec sheet looked good.
Step six: Ask about the controller and the warranty. Heat kills controllers, and sustained climbs on a 105-degree Tuesday are the test. A warranty that actually covers the electronics is worth more than a slightly higher top speed.
Step seven: Set tire pressure the day it arrives. Find the PSI on the sidewall, pump to the upper end of the recommended range for pavement, and recheck weekly. This one habit buys back range, speed, and tube life.
Step eight: Set the brakes and the lights before the first commute. Bed the brakes in on an empty street. Aim the headlight at the road, not at oncoming drivers. Ride with a helmet, every ride, no exceptions.
Mistakes I see first-time commuters make
Buying range instead of hills. A scooter that claims big miles but cannot climb your bridge is a big number on flat ground you do not have.
Believing peak watts. Peak watts are a party trick, a two-second spike on a spec sheet. Sustained watts and watt-hours are what actually move you.
Ignoring deck height and fold time. A tall deck is stable at speed and awkward at stoplights. A fold that takes 30 seconds is a fold you will stop using.
Skipping the helmet. I have heard what an ER nurse says about scooter crashes without one, and I have worn one every ride since.
Riding a scooter that is too fast for the street you ride. A 60 mph scooter in a 20 mph bike lane is not a flex, it is a problem.
What this all costs
I am not quoting prices here, because they move and the listing is the only place with the current number. Check current Amazon price on both scooters before you decide.
What I will tell you is how to think about it. The cheap scooter you outgrow in a month is the most expensive one you will buy, because you pay twice. A mid-priced commuter that survives two years of daily riding works out to pennies a day, and that is before you count the bus fare, the parking, and the rideshares you are not paying for.
Budget the accessories on day one, not month three: a helmet, a pump with a gauge, a patch kit, and a light. Those are not optional extras. They are cheaper than one missed day of work.
The bottom line
Pick the scooter that climbs your hill at your weight, carries up your stairs, and runs tires you are willing to maintain. Everything else on the spec sheet is decoration.
Then pump the tires, set the brakes, put on a helmet, and go find out what your commute feels like when you are not stuck in it.