Most scooters do not die from miles. They die parked. Water sits in the deck, the battery gets left at 100 percent in a 105-degree carport, and the controller corrodes quietly through a winter of drizzle until the day it smells like burnt toast and you walk home. Seated electric scooter storage is the part of commuting nobody writes about, and it is the difference between a scooter that starts on a Tuesday in August and one that strands you on the curb.
I have been car-free in Austin for four years, ever since a 2008 Honda gave up at the intersection of Lamar and 38th. My commute is 14 miles round trip across the Congress Avenue bridge, plus errands, brewery runs, and the occasional 2 AM taco run. In that time I have owned seven scooters, blown two controllers, patched four tubes, and replaced one deck. Almost none of that damage happened at speed. It happened while the scooter was sitting still.
A seated scooter makes storage harder, not easier. You have a seat post, a wider deck, a taller folded profile, and one more hinge for grit and water to find. This guide covers the two pieces of gear I would start with and the parking routine that keeps a commuter scooter alive between rides.
Why you should trust me
I am not going to tell you I ran my 14-mile loop on every scooter on the internet. What I can tell you is what storage does to a scooter over a year, because I have watched it happen to seven of them in my own carport. I keep a repair log in a battered notebook and a spreadsheet of every mile, every tire pressure, and every range claim that turned out to be fiction.
Four years of car-free commuting in Texas heat and rain teaches a specific set of lessons, and the expensive ones are all the same lesson. A GOTRAX taught me what a controller smells like when moisture finishes it off. A Hiboy taught me that tubed tires hate Texas heat and low PSI. A used Kaabo taught me that a 60 mph scooter is not a commuter just because it is fast. The failures I paid for were preventable, and most of them started with the scooter parked in the wrong spot with the wrong thing over it.
I also do not ride without a helmet, and I will say that in every article I write. Storage advice is worth nothing if you are not around to use the scooter.
How I picked the gear in this guide
Two things matter for the routine below: the scooter and what you throw over it. I picked one of each, and I judged both on spec sheets and on what I know fails, not on a test ride I did not do.
For the scooter, I looked for an honest commuter shape: a motor in the 450W class, a range claim in the 20-mile neighborhood, and a deck you can stand on when you want to stand. I read the sheet the way a mechanic reads a wiring diagram, which means watt-hours matter more than amp-hours, hill behavior matters more than top speed, and tire type matters more than paint.
For the cover, the checklist is short and unforgiving. It has to be waterproof rather than "water resistant," it has to have a reflective strip because a covered scooter parked near a driveway is invisible at night, it has to pack into its own bag so you will actually carry it, and it has to be big enough to clear a seated scooter's handlebars and seat. If a cover cannot clear the seat, you will fight it every evening and quietly stop using it by the second week.
The rest of the guide is the routine itself: nine steps, no tools beyond a tire pump and a rag.
The gear this guide is built around
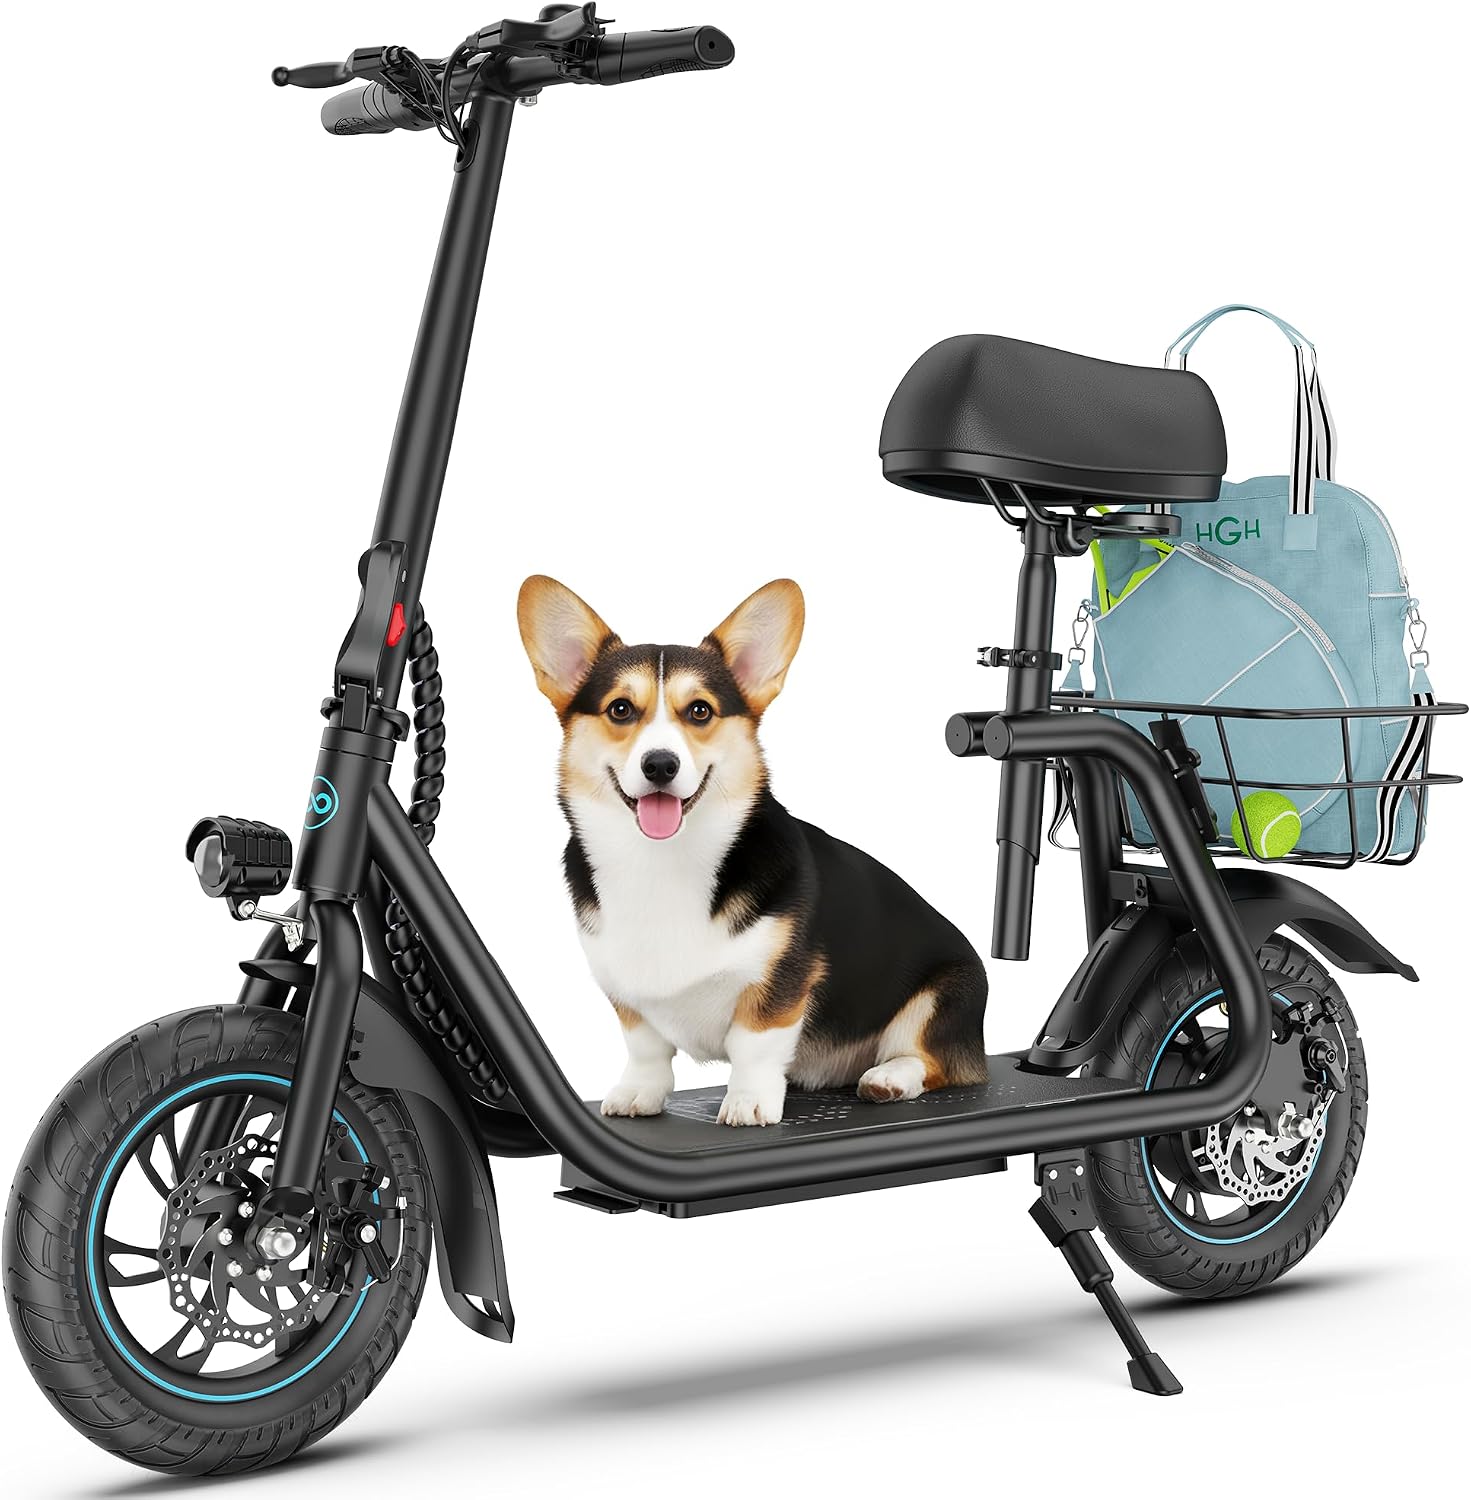
The ride: Gyroor Electric Scooter with Seat for Adults C1 450W Motor 20 Miles
 Visit on Amazon →
This is the seated commuter the routine is built around. The spec sheet lists a 450W motor and 20 miles of range, and I want you to read those numbers the way I read every range claim: as a lab figure taken with a light rider, no wind, flat ground, and a fresh battery off the charger. At my weight, in August heat, with a bridge in the middle of the route, expect less. That does not make the scooter a bad buy. It makes the number marketing.
The seat changes more about the commute than the motor does. Sitting means your knees stop complaining at mile four, which matters if your ride is longer than a mile or two. The trade-offs are weight, a taller folded profile, and more surfaces to dry after rain, which is exactly why the storage routine below is worth running.
Check current Amazon price before you commit, since scooters in this class move around.
Two specs to verify before you trust it in weather. First, the IP rating: IP54 and up is rain-safe-ish, anything less is a fair-weather toy. Second, the tires: tubed tires are a maintenance subscription in Texas heat, so budget for a pump and a patch kit before your first flat. And no scooter is worth riding without a helmet.
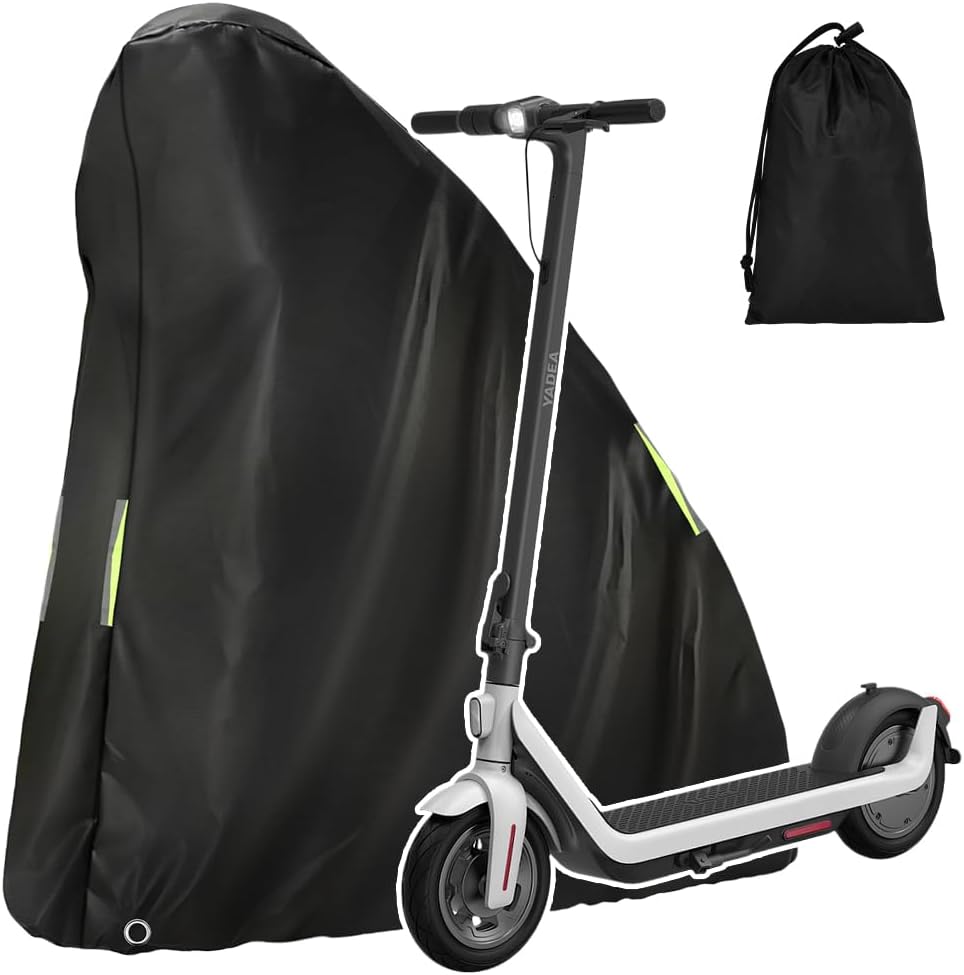
The shield: flintronic Electric Scooter Cover, Waterproof Universal E-Scooter Storage Cover with Reflective Strip & Storage Bag
 Visit on Amazon →
This is the cover I would put on a seated scooter parked in a carport, on a patio, or under a stairwell. It is advertised as waterproof with a reflective strip and a storage bag, and those three features cover the entire job: keep the water out, stay visible at night, and pack small enough that you actually carry it instead of leaving it on a hook.
The reflective strip matters more than people think. A covered scooter in a carport is a black lump at eye level for nobody and at ankle level for everyone, so angle the strip toward the driveway or the walkway where a car or a cyclist will actually catch it.
Measure before you order. A seated scooter is longer and taller than a standing one, and a universal cover only works if it clears both the handlebars and the seat. And cover a cool, dry scooter. Trap a hot motor under a waterproof shell and you get condensation on the inside of the fabric and on your deck, which is the exact opposite of the point.
Check current Amazon price. Compared to a controller replacement, it is the cheapest insurance in this whole routine.
The storage and protection workflow
Step one: pick a spot that drains. Walk your parking area after a real rain and find where the water goes. You want the high side of the carport, not the low spot, and never directly under a downspout or where the gutter dumps. Standing water under a kickstand is how deck bearings and kickstand springs die.
Step two: measure the folded footprint before you buy anything else. Folded length, handlebar height, and seat height are the three numbers that decide whether a cover fits and whether the scooter slides into the corner you have in mind. Write them on your phone so you are not guessing in a parking lot.
Step three: get it off bare concrete. A rubber mat or a scrap of plywood under the wheels and kickstand keeps the scooter out of the film of water that sits on a slab for hours after rain. This costs almost nothing and it is the single easiest upgrade in this guide.
Step four: charge to 60 to 80 percent, then unplug. A full battery sitting in heat is the fastest way to shorten its life, and a battery sitting at zero for weeks is the fastest way to kill it outright. If you ride daily, this step is simple: charge after the ride, unplug before bed. If you park it for a week, leave it in the middle and top it up the night before you ride.
Step five: let it cool before you cover it. Give the motor and the deck 20 to 30 minutes. Covering a hot scooter traps warmth and moisture together, and moisture is the enemy of every connector on the thing.
Step six: cover it top down and cinch the bottom. Drop the cover over the handlebars first, work it down over the seat, then tighten whatever cord or hem holds the bottom. Wind will find any loose flap, and a flapping cover rubs paint and lets rain in at the seams.
Step seven: check tire pressure weekly. PSI is the most ignored spec on scooters and the cheapest range you will ever buy back. Low pressure costs you speed, costs you range, and pinches tubes on potholes. Do it every Sunday, and again before any ride longer than five miles.
Step eight: dry and lube the moving parts. After a wet ride, wipe the seat post, the folding hinge, and the kickstand spring, then put a single drop of lube on each pivot. Grit plus water plus a hinge equals a hinge that seizes in three months.
Step nine: never charge a wet or hot scooter. Let it dry, let it cool, and charge it inside the house or in a dry spot when you can. If your scooter's pack comes out, bring the pack in and leave the frame outside. If it does not, at least keep the charger and the charge port dry and out of the sun.
Step ten: lock it through the frame, not the brake disc. A seat and post are the easiest parts to walk off with, so lock the frame to something solid and take anything that comes off with a single bolt. A quick-release wheel and a cable lock is not security, it is a suggestion.
Run the whole routine once and it takes about five minutes. The weekly version, meaning pressure, a quick wipe, and a look at the cover, takes two.
What breaks first, and the caveats
In my experience the order of failure is consistent. Controllers go first, usually from moisture and heat rather than abuse. Battery management goes second, because cheap scooters cheap out on the circuit that keeps the cells balanced. Tires come third, and almost always because of pressure rather than punctures. Bearings, throttles, and seat posts round out the list.
Here is the caveat that matters most: a cover is not a garage. It keeps rain off, it keeps sun and bird mess off, and it keeps the deck dry enough that water is not pooling on it. It does not stop condensation on a humid night, and it will not save a scooter parked in a puddle. If you have a monsoon week coming and a dry hallway available, take the scooter inside and leave the cover on the hook.
Second caveat: heat. Do not store a scooter in a car, a metal shed, or a spot where afternoon sun lands directly on the deck. Battery capacity does not come back after a summer of that, and voltage sag under load gets worse as the cells age.
Third caveat: rain riding and IP ratings are not the same thing. A scooter rated for splashes is not a scooter you should ride through standing water. Dry it, lube it, and check the connectors if you do get caught out.
Alternatives and what to skip
Skip the blue tarp. It is cheap, it abrades paint in the wind, and it traps water underneath as often as it sheds it.
Skip bike covers that are not sized for a scooter. They snag on handlebars, they never clear a seat, and you will stop using one within a week.
Skip any cover described as "water resistant" with no real weatherproofing claim behind it. Water resistant means it survives a drizzle and gives up in a real storm.
Skip storing the scooter with the charger plugged in for days at a time. It is a small fire risk and a big battery-life tax.
Skip the temptation to park a covered scooter where it blocks a walkway or a driveway. A dark lump at ankle height in a place people walk is how scooters get kicked, hit, and reported.
What this all costs
The cover is the cheapest piece of the system and it protects the most expensive one. A controller replacement, a new battery pack, or a new deck each costs far more than the cover does, and every one of those failures is something a parking routine makes less likely.
Do the math over two years: a pump, a patch kit, a rag, a bottle of lube, a mat, and a cover. That is the entire shopping list, and it is a fraction of what one repair costs. The cover and the scooter both live on Amazon, so check current Amazon price on each and let the numbers talk.
The rest of it is free. Charge in the middle, park where it drains, keep it off the concrete, cover it cool, check the pressure, wipe the pivots. Five minutes a week is what separates a commuter scooter that survives four years of Austin from one that becomes a garage ornament by October.
Your scooter was built to do this. The storage is the part you control.