A commuter electric scooter setup is not a shopping decision. It is a checklist, and it is about two hours long. I ride 14 miles round trip across the Congress Avenue bridge every weekday, in Austin heat that turns weak controllers into burnt toast and turns tire pressure into a weekly chore. The scooters I see parked and defeated on the Lance Armstrong Bikeway at 6 PM are almost never the wrong model. They are broken because nobody checked the stem bolts, nobody set the tire pressure, and nobody learned how the brakes felt before a car door opened in front of them.
Range claims are the other trap. A manufacturer number is measured with a light rider, no wind, a freshly charged pack, and a flat road. Real range is what you get at 185 pounds in August with a headwind and a bridge to climb. So I treat every printed range as a claim and I treat watt-hours as the number that actually matters.
This guide is the setup side of it. What to check, in what order, on the two scooters I would hand a first-time commuter, and what to fix before you ever point one at traffic.
Why you should trust me
I have been car-free for four years, since a 2008 Honda gave up on a hot June morning at Lamar and 38th. Since then I have owned seven scooters. I have blown two controllers, patched four tubes, replaced one deck, and learned to read a spec sheet the way a mechanic reads a wiring diagram. I keep a repair log in a battered notebook and a spreadsheet of every mile ridden, every tire pressure, and every range claim a manufacturer made that did not survive contact with my loop.
I test on the same 14-mile route every time: same rider weight, same tires pumped to the same PSI, same August heat, and I log watt-hours pulled instead of repeating the number on the box. I also wear a helmet on every single ride, and I will say so in every article, because the ER nurse who explained to me what a scooter crash without one looks like did not have to explain it twice.
How I picked and how I tested
For a beginner commuter, the gear list is short and the requirements are boring on purpose. The scooter has to be light enough to carry up three flights of stairs, simple enough that the owner can adjust the brakes and check the bolts, and cheap enough that nobody is financing a toy. A scooter you cannot carry is a garage ornament. A scooter with a controller that strands you at 9 PM is a long walk home.
So both picks below were judged on four things, in this order. Can it climb the bridge at my weight without voltage sag drama. What tires does it ride on and how much will I hate them in August. What happens to the controller under a sustained full-throttle run. Would I trust it to get me to work on a 105-degree Tuesday and back.
I do not repeat a range claim without measured watt-hours behind it, and neither of these listings gives me that, so both stay framed as claims. What I can tell you is what the spec sheet implies, what the tires mean for your maintenance load, and what to verify before you spend anything.
The two scooters worth setting up
Both of these are first-commuter scooters, not forever scooters. That is deliberate. You learn what you actually need by riding, not by reading, and the right beginner scooter is the one that teaches you cheaply.
Budget pick: Electric Scooter - Electric Scooter Adults and Teens
 Visit on Amazon →
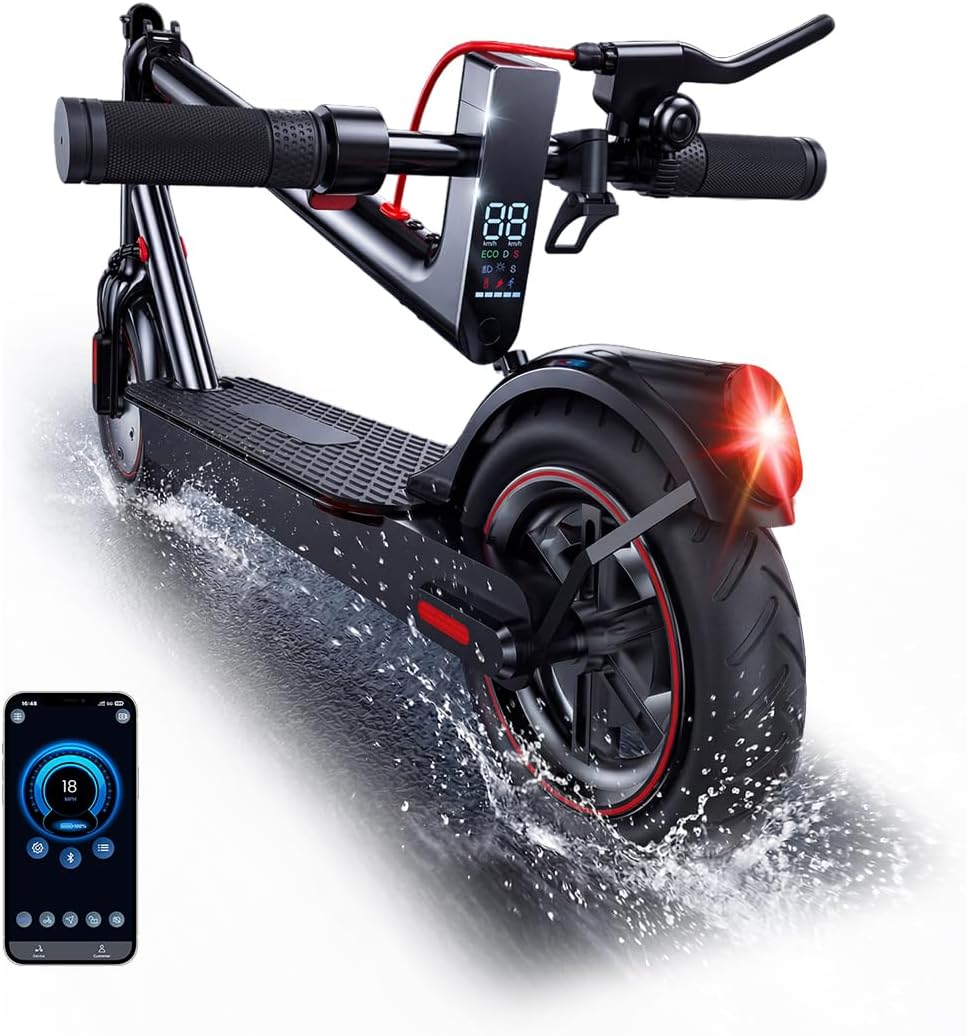
This is the one I would point a first-time buyer at when the budget is tight and the commute is short. The listing is built around adults and teens, which usually means a lighter, more forgiving platform than the big dual-motor commuters, and lighter is the right direction for a beginner. A scooter you can lift with one hand is a scooter you will actually take to work.
Check current Amazon price before you commit, and check three specs while you are on the page. The battery capacity in watt-hours, not amp-hours, because Ah is marketing math. The tire type, because tubed tires on a commuter scooter are a maintenance subscription you will pay in patches. And the weight, because you are lifting this up stairs, onto a bus rack, and into a hallway at the office.
Flaws but not dealbreakers: At this end of the market the controller is the part that fails, and it fails with a smell you will recognize immediately. Ride it within its limits, avoid long full-throttle climbs in the heat, and do not add water. Anyone commuting under five miles each way in mild weather will be genuinely happy with this.
Our pick: Hiboy S2 Electric Scooter - 8.5" Solid Tires - Up to 17 Miles Long-Range
 Visit on Amazon →
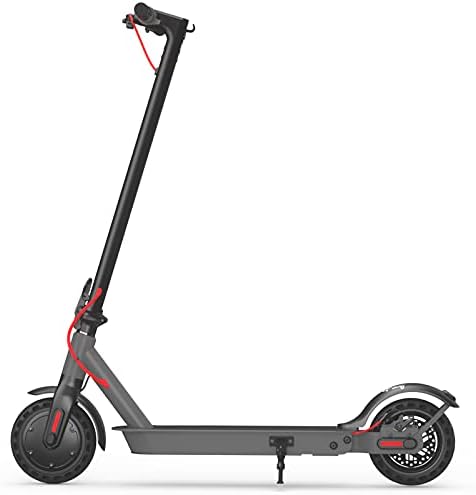
The reason I put this at the top of the beginner list is the tires. Solid 8.5 inch tires mean no inner tubes, which means no pinch flats, which means the single most common reason a commuter scooter ends up parked for two weeks simply does not happen to you. Every flat I have patched happened on a tubed tire, usually on a pothole I saw coming and hit anyway. Solid rubber removes that entire category of bad evening.
The listing names a range of up to 17 miles. Treat that the way I treat every range claim, as a lab number from a lighter rider on a better day, and assume your honest commuting range is meaningfully shorter, especially in August with a bridge in the middle. Check current Amazon price on the listing, then do the only range math that counts: your round trip, plus 20 percent, and whether the pack covers it with room to spare.
Flaws but not dealbreakers: Solid tires ride harder than air. You feel every expansion joint, and wet grip is not as good, so brake earlier in the rain than you think you need to. The trade is a scooter that starts every single morning. Anyone who wants a first commuter they do not have to maintain much should start here.
The actual setup, step by step
Do this in your driveway, not on the road, and do it before your first commute. It takes about two hours the first time, twenty minutes after that.
Step one: Read the sticker, then ignore the range. Find the battery voltage and amp-hours, multiply them, and write the watt-hours in your phone. That number is your real capacity. Every decision about charging, hills, and how far you can go comes off that number, not off the marketing miles.
Step two: Set tire pressure, or confirm you do not have to. On a tubed scooter, look up the sidewall PSI and set it with a real gauge, not a thumb. Ten PSI low costs you range, speed, and tube life. On a solid tire scooter, there is nothing to inflate, so spend that time checking that the axle nuts are tight instead.
Step three: Adjust the brakes. Cable brakes stretch in the first week, which is why every new scooter feels great on day one and vague on day nine. Set the lever so it bites with about a third of the travel left, spin the wheel, and listen for rub. Do this again after your first 20 miles.
Step four: Check every bolt on the stem. The folding latch is the joint that holds you up. Open it, close it, and check the tension. If it rattles when you shake the handlebar, tighten it now, not at 18 mph in a bike lane. A little thread locker on the stem bolts is cheap insurance.
Step five: Learn the throttle and brake feel somewhere empty. Every scooter has a different power curve, and the first inch of throttle is where beginners get surprised. Do figure eights in a parking lot for ten minutes. Practice emergency stops until stopping hard is boring.
Step six: Sort out lights and visibility. A scooter is low, quiet, and easy to miss. Run a front light and a rear light during the day too, and assume nobody sees you at dusk until proven otherwise.
Step seven: Fix your charging habits. Do not store it at 100 percent in a hot garage, and do not leave it at zero for a week. Charge to full the night before a commute, and if you are parking it for a month, leave it around half. The BMS in a cheap scooter is not doing you favors, so you have to.
Step eight: Plan the parking before the commute. Where does this thing go when you arrive. Under your desk, in a closet, on a rack. If the answer is nowhere, you will stop riding within a month, and it will have nothing to do with the scooter.
Step nine, and this one is not optional: helmet on. Every ride, every time, even the two-block errand. That is the boundary I do not cross and neither should you.
What the first week will teach you
Expect the brakes to need a second adjustment, expect a few bolts to loosen as everything seats, and expect the real range to settle in below what you hoped. Log your actual miles and your actual charge cycles for seven days. That log is worth more than any review, including mine, because it is your weight, your hills, and your weather.
If your commute is out-climbing the scooter, you will feel voltage sag first. That is the drop in power when the pack is low or cold, and it is the reason 50 percent battery rides like 20. If it shows up on your route, you bought the wrong scooter for your hills, or you need to charge at the office.
The competition and why it lost
The Segway Ninebot Max G2 is the scooter I ride most and the one that survived a full year of abuse without a single unplanned repair, but it is not a beginner's first setup. It is what you buy after you know you will actually commute.
The NIU KQi3 Pro is the best value commuter I have ridden, with honest range and a solid build, and it belongs on your shortlist the moment your budget grows. The Hiboy S2 Pro is fine as a first scooter and nothing more, and the S2 with solid tires solves the exact problem that made me sour on the Pro. Unagi is the prettiest scooter I have ridden and the most overpriced, because you are paying for design and not distance. Xiaomi is the best budget option if you are under 170 pounds. Over that, the deck flexes and the brakes start lying to you.
None of those change what this article is. Whatever you ride, the setup is the same eight steps, and skipping them is how a good scooter becomes a bad story.
What this all costs
The scooter is the easy line item, and it is also the one that changes weekly, so check current Amazon price on both listings before you decide. What people forget is the setup budget: a helmet, a floor pump with a real gauge if you have tubes, a light set, a lock you will actually carry, and a small bag with a multi-tool, zip ties, and a spare charger. None of that is optional gear, it is the difference between a scooter that commutes and a scooter that decorates a hallway.
Spread over a year of weekday rides, the helmet and the lights cost less per day than the coffee you buy on the way in. The controller you do not burn out costs nothing at all.
That is the whole job. Pick something light enough to carry, set it up properly in your driveway, ride it like traffic can not see you, and wear the helmet. Your scooter was built to do this. Let it.